Overview
While Alluvial provides predefined roles for managing user access, there are times when more granular control is required.
Custom Roles allow you to restrict access to specific project content, such as visualizations, dashboards, or other entities, for particular groups of users.
Getting Started
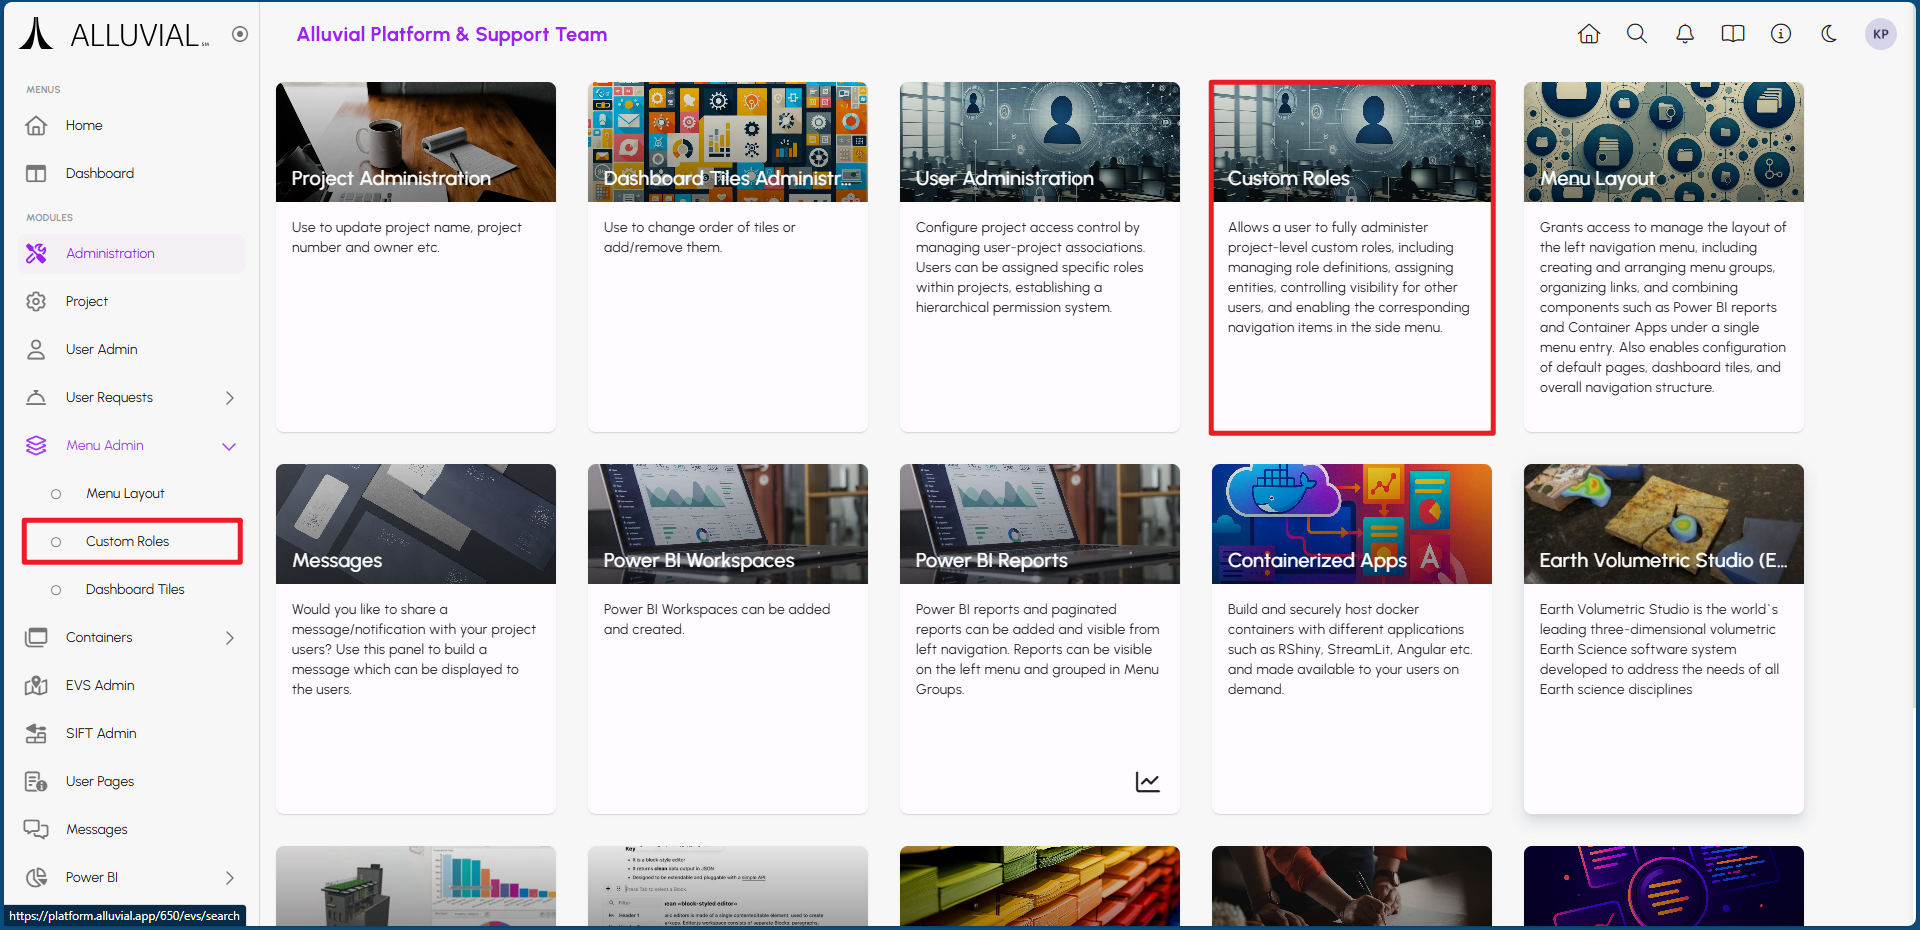
Open the Custom Roles Page
Custom Roles can be created and managed through the project administration page, accessible via the Menu Admin section in the left-hand navigation menu or by clicking on the Custom Roles card.
If your project does not have any Custom Roles yet, the Custom Roles page will be empty.
Core Concepts
Roles and Entities
A Custom Role is a collection of project entities that should be visible only to certain users. After a role is created, you can add items to it and organize those items as needed.
Role Creation vs. Role Assignment
Creating a Custom Role and adding entities to it does not enforce access by itself. To make the role effective, the Custom Role must also be assigned to one or more users in the project.
Multiple Roles per User
A user can be assigned more than one Custom Role when needed.
Common Tasks
Create a Custom Role
- Click CREATE CUSTOM ROLE.
- Complete the form that appears.
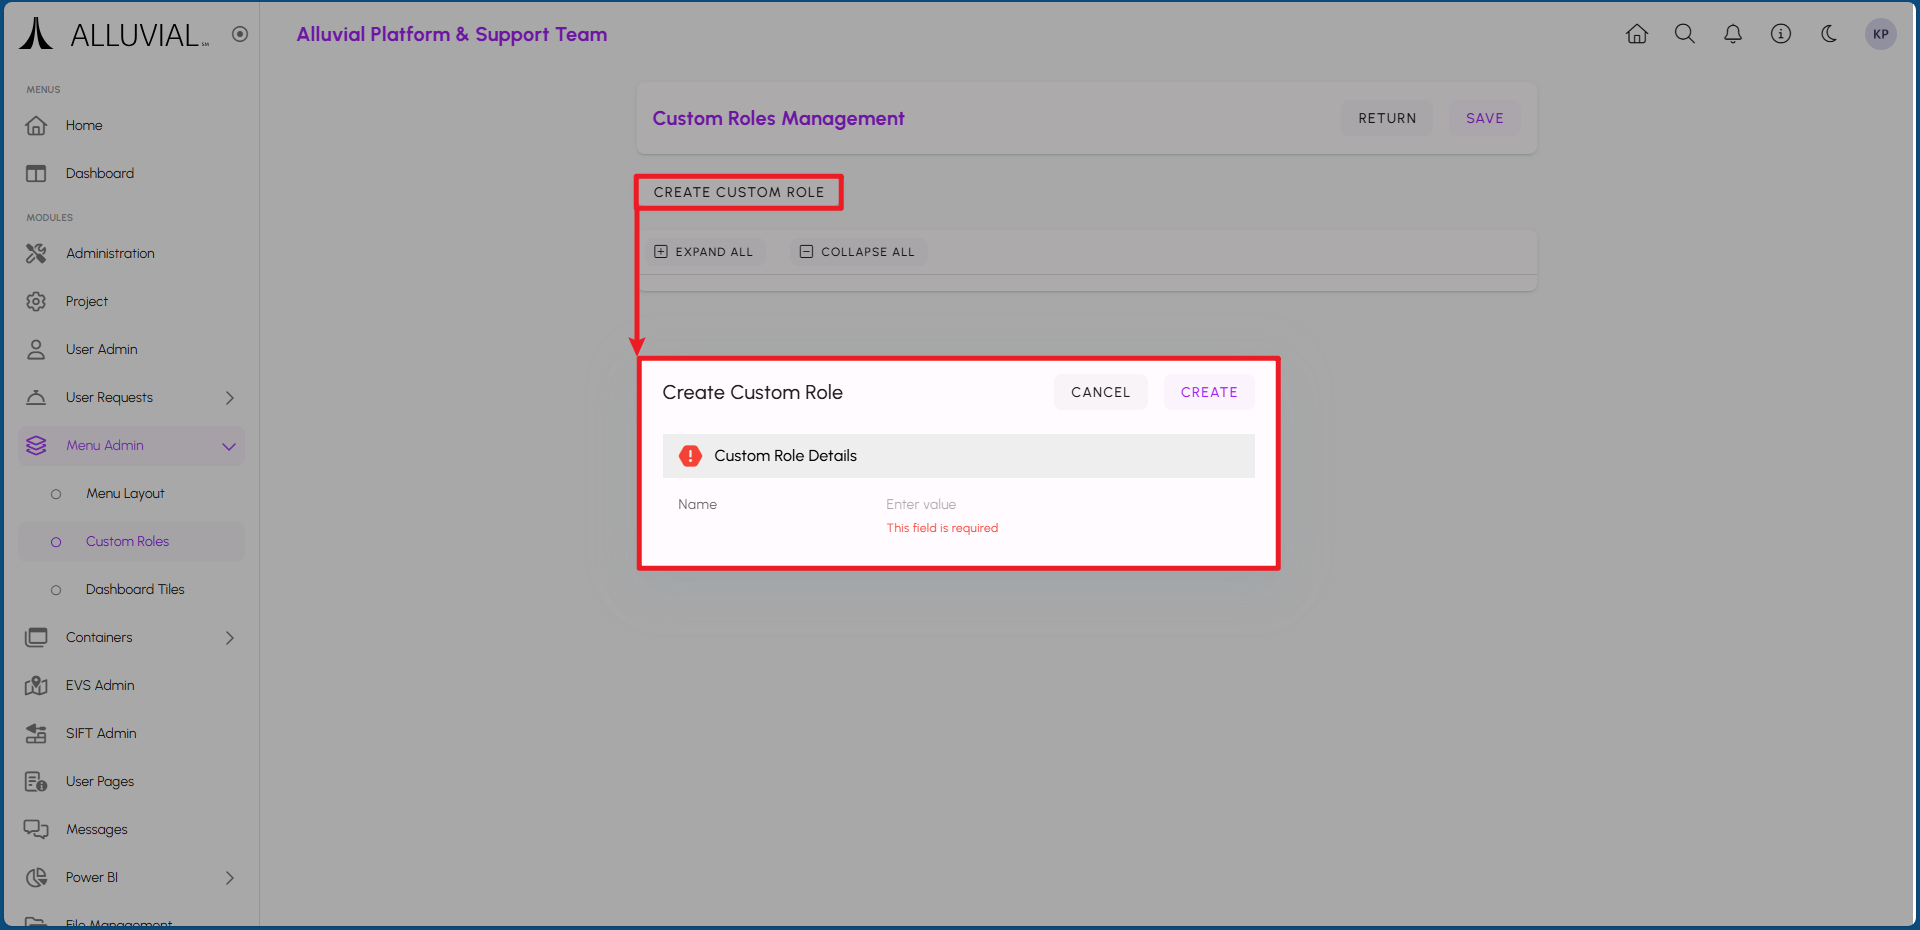
- Click SAVE to create the role.
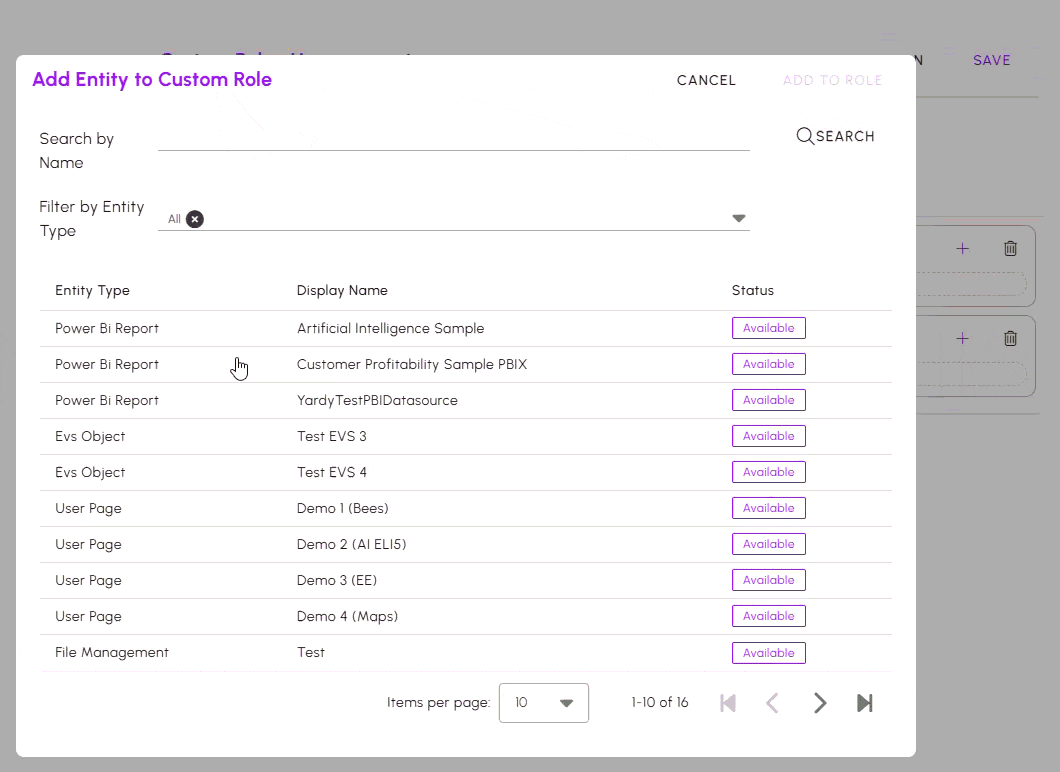
Add Entities to a Custom Role
- Click the + button next to a Custom Role to add project resources to it.
- If entities are rolled up inside the role, click the arrow next to the role to expand and view the contents.
Move Entities Between Roles
Much like in Menu Layout, entities can be moved from one Custom Role to another by clicking and dragging them as needed.
Assign Roles to Users and Enforce Access
Creating the Custom Role and adding entities to it is only the first step. To enforce access control, the Custom Role must be assigned to specific people within your project. This is done by navigating to User Administration and selecting the user you want to assign the role to.
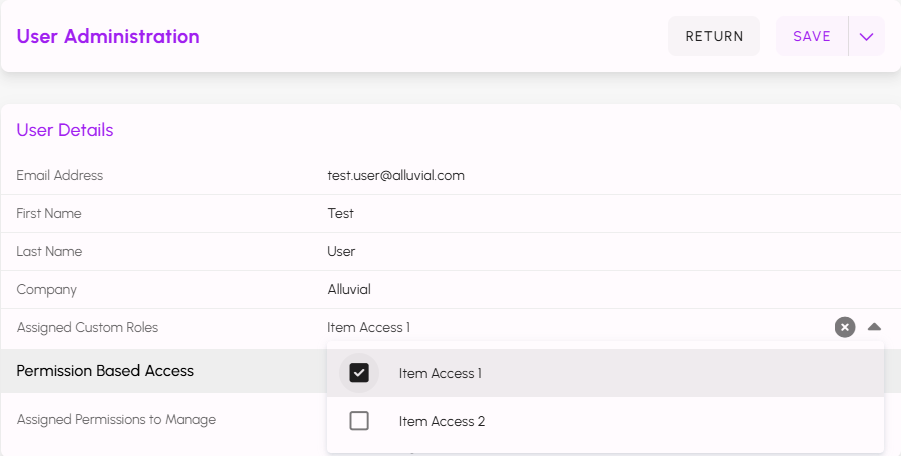
After selecting the desired role or roles, click SAVE to apply the changes.
Only users with the assigned Custom Role can access the associated visualization. This restriction applies to all users, including project administrators.
IMPORTANT: If you cannot see a visualization that others can, check whether a Custom Role needs to be applied to your account for that project.
Additional Functionality
The following additional functionalities are available for managing Custom Roles:
Editing Custom Role Names
Each Custom Role has an edit icon (pencil) next to it. Clicking this icon opens a form that allows you to modify the name.

Deleting Entities and Roles
Clicking on the broom icon next to each role will remove all entities from that Custom Role. Clicking on the trash can icon beside an individual entity will remove just that item from the Custom Role.

All entities must be removed from a Custom Role before the role itself can be deleted. Once empty, click on the trash can icon next to the Custom Role to delete it.
